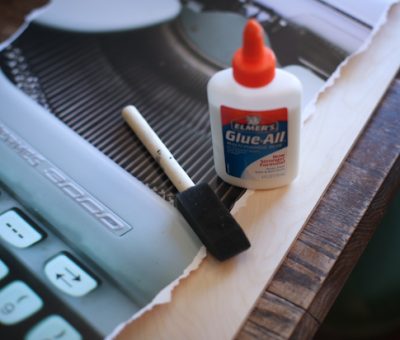
Lisa Leonard Designs

Archive for the ‘DIY’ Category

DIY {messy scarf}

November 20th | DIY, inspiration

One of the questions I get asked a lot is, ‘How do you tie your scarf?’ I’ve come up with a way I like, it’s not technical but the end result is cozy and fun. Here’s how I do it…

1. Start with one end around your neck.

2. Wrap around once.

3. Then wrap around a second time. You should have two short tails on either side.

4. Tuck the fist side halfway through the bottom part of the scarf. Don’t pull it all the way through.

5. Do the same thing on the other side– pull the end halfway through.

6. Fluff and adjust until you get the desired look. Easy and fun!

Here’s another scarf tying tutorial here. Do you loves scarves as much as I do?

candle cozy DIY

November 13th | decorating, DIY

This is maybe the easiest DIY ever! I already had a bunch of mason jars and candles around–I picked up a pair of tights and did a little snipping–and I was done! Cozy candles. Feels like winter, don’t you think?

I think this would be adorable on the porch or surrounded by greenery for a holiday table. I’ve got Christmas music playing and starting to decorate. I’ve been trying to be patient–but I can’t wait any longer! When do you start decorating for the holidays?

DIY sailboat

July 12th | DIY, inspiration

How about some DIY inspiration? Alex and I found this old sailboat at an estate sale and we decided to give it a new life. We put our heads together and decided we should switch out the sails with some fun fabric and add some charming details. Alex took over and made it happen–and I can’t wait to show you how cute it turned out!

Here’s the ‘before’ {above}. It’s just your cute, basic sailboat. I see these in thrift shops now and then.

For materials, you’ll need some fun fabrics, paint, a small brush, washi tape, embroidery thread and sticky letters if you want to customize your sailboat with a name.

First, remove the sails–but keep them in tact so you can use them as a pattern for the new sails.

Just lay the old sails on top of the new fabric and cut around the edge so the sizing is the same. Easy!

Using embroidery thread, tie the edge of the sail tightly and attach to the various eye holes in the boat’s structure.

Paint the top edge of the sailboat in a fun color. We used navy for a nautical feel.

A little washi tape around the bottom platform for some texture and stripes.


Isn’t that fun? The colorful fabrics really give it personality! And I love the idea of adding a kid’s name to make it personal. What’s inspiring you today?

Spare room re-do

June 15th | decorating, DIY, inspiration

Our spare room has been somewhat neglected. It’s comfortable–but considering we have company staying with us a couple times a month, I wanted to spruce it up and make it prettier and more homey!

Above is a ‘before’ pic. I could have tidied it up {it didn’t always look quite this messy} but since I had plans to freshen it up–this is what you get! I loved that old bed frame, but it was actually pretty creeky–so I decided to replace it with two twin beds on simple metal frames.

The bedspreads are from Target {a couple years ago} and the striped sheets are from TJ Maxx. I wanted to keep this project affordable, so I used mostly things I already had on hand.

The velvet throw pillows are from Target and the aqua lamp is from TJ Maxx.

The knick knacks on the shelf are all things I already had–thrift store finds and some inexpensive vases from Ikea.

That big white frame was a garage sale find. I was going to spray paint it, but then I thought the large white frame was a nice balance to the window over the other bed.

Yay! All fresh and new–and so cozy! My sister and her family are staying with us and I hear the beds are comfy. I love a new, fresh room–don’t you?

how to make pinwheel straws

May 24th | DIY

I love pinwheels! For Father’s Day this year, I thought it would be fun to use some pinwheel decor. Pinwheels stuck in the grass, made into cupcake toppers and even tied around paper straws.

Last year I did a tutorial on how to make pinwheels–they are so easy!

Once I create the pinwheel, I wrapped some bakers twine from underneath the brad in the center, and then around the straw. I tied it nice and tight–and it turned out so sweet!

 These really dress up the table and make it feel like a celebration. And even more–they feel like summer! Serve cold, colorful soda and some BBQ and you’ve got yourself a party. Love it.

DIY {sprucing up the backyard}

May 4th | DIY

We have a great backyard but I hadn’t done much with it to make it cute. It looks a lot bigger in these pics than it actually is in real life. The backyard is kind of a triangle shape, so while the farthest corner goes back pretty far, it’s a narrow yard.

Here’s the before pic. We’ve had this wicker settee and chair for a couple years. And there were just random toys here and there.

I found a plain outdoor rug at CVS {of all places!} and it really defines the seating area. The white table was a flea market find last weekend. Only $15!

I picked up a few outdoor pillows at Target that feel fresh and fun for summer.

A simple change, but much better!

I hung some spray-painted bottles from the tree to use as outdoor vases. So fun!

The flowers have lasted a week out there and they look so fresh.

I wrapped wire right under the lip of the bottle to create a hanger. It’s easy to do, just make sure you get the wire nice and tight so the hanger stays put! Now I want to make hangers for some mason jars to use as candle holders in the evening for some soft light.

I’d like to put a large chalkboard outside and get a croquet set for summer BBQ’s. Do you have plans to spruce up your backyard for this summer?

homemade easter egg nests

March 22nd | DIY, food & goodies

I whipped up these little easter egg nests a few days ago and they were so easy and turned out so cute–I had to share!

I used the basic rice krispy treat recipe, but instead of rice krispies I used rice noodles.

For ingredients you’ll need rice noodles, marshmallows, butter, non-stick spray {for the muffin tin} and jelly beans or chocolate eggs.

Follow the directions on the marshmallow bag or these directions here. After they were ready, I put a scoop of mixture into each muffin tin. The mixture was really hot, so I waited a few minutes until it cooled and then used my fingers to shape each scoop into a nest.

To finish it off, I stamped manilla tags with our enjoy stamp and tied them around cellophane bags. So simple and so sweet!

Wouldn’t these be fun at each place setting for Easter lunch?

Now my mouth is watering, must go find some leftover chocolate eggs to munch on!

Eric Carle inspired Lorax project

March 15th | DIY, matthias

After seeing The Lorax movie last weekend, Matthias and I decided to do an art project together. Well, he needed a little coaxing {

he’s got strong opinions about what he wants to create} but after a few minutes he got on board.
I had an idea to do something inspired by Eric Carle, I love his artwork, don’t you?

We started by painting a piece of paper completely orange. This would be used to cut out the shape of the Lorax.

We used watercolors for this project.

He was determined not to have any bits of white show through on his painted orange paper.

I also painted a piece of thick, white paper completely yellow–for the mustache and eyebrows.

While the painted papers dried, we worked on creating the background on a canvas. First Matthias sketched some truffula tree trunks.

To make the trunks look stripe-y we used water down black paint and then dabbed a napkin here and there on the trunk to soak up paint in certain spots. The truffula tufts were fun to paint in a swirly motion.

We drew a little dot above the top of the tree trunk and then painted swirly lines coming out from there until we had a nice fluffy tuft. The Lorax is cut out of the papers we covered with paint. I drew a pattern for us, but you could use a coloring sheet like the one found here for a pattern, too!

We each did our own project, but Matthias’ turned out way cuter than mine!

We are huge Dr. Seuss fans over here. For David’s 5th birthday party we had a Sneetches celebration.

Have you seen The Lorax?

DIY shamrock garland

March 1st | DIY

Hello friends! Can’t you believe it’s March 1st? March means spring is right around the corner. I cooked up a little shamrock project to share.

All you need for this project is some thick paper {I shopped the scrapbooking section at our Michael’s}, brads, hole punch, scissors and twine.

Each shamrock needs three hearts and a stem.  I folded the hearts down the center to give the shamrock more depth.

Punch two holes in the top of each shamrock to string the twine through.

So fun and a hint that spring is coming too!

These plaster heads are still watching over our entryway, which is about to get a makeover.

Remember this post? The winning color for painting the bench is yellow. I’m off to buy paint and hopefully I’ll share our bright, new entryway in the next couple weeks!

Are you looking forward to spring?

Pin It

his very own art gallery

February 14th | decorating, DIY

A couple months ago, Matthias told me, “In our next house, I want to have my very own art gallery.” And since we have plenty of space, and no plans to move any time soon, I thought, “Why not give him an art gallery now?”

We have a loft upstairs that connects all the bedrooms. It’s a great space but I’ve never really decorated it.  I pulled everything out of the room–some random throw pillows, an old lamp and some random toys–and left just the basics for a clean slate.

Here’s the finished space. It’s whimsical and simple–a perfect kid’s space. I framed a few of his favorite pieces of art–and there’s lots more room for more framed artwork!

We found this couch a couple years ago at Pottery Barn. It was a floor model and marked way down. It’s super comfy.

The chair is from Target quite a few years ago and it’s still in great condition.

I picked up a couple new pillows and the small aqua lamp from Target. All of it was on sale–nice!

I love this Eric Carle style sun art that Matthias did last year in first grade.

I drew some chalk frames on the chalkboard and we can add more frames and art as needed.

Matthias loved it. And now he has his very own art gallery!  Doesn’t it make you want to pull out the watercolors and create?

Pin It